Green roof installation: drainage, railing, pavers
This is the old roof surface, pavers over EPDM membrane. The roll of material is the new drainage mat (Carlisle MiraDrain GR9200). The pavers have been on the membrane for six years. Sand had been swept into cracks.

New surface at about 50% installation on the right. Old surface on the left. We moved each paver at least 3X as we lifted the pavers and installed the drainage mat.

This is the reverse side of the drainage mat (Carlisle GR9200). The "cups" are about 1/4 inch deep. The cups are installed down, with the plastic against the EPDM membrane.

Close-up, reverse side of the drainage fabric, showing the cups.

Close-up of the drainage mat (Carlisle GR9200). Note that the woven fabric is see-through, and that the cups are now right-side up.

Roof surface 100% covered with drainage mat (Carlisle GR9200). Note the stack of pavers at the far corner.

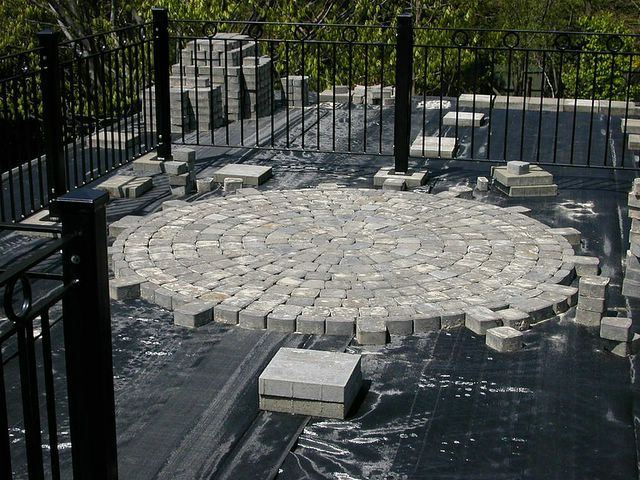
Railing being installed. The railing had been on the original installation. We removed it, sand-blasted it, and had it powder-coated. Hand-painting the railing every three years with Rust-Oleum gets old quickly. Note the stacks of pavers at the rear of the roof.

First circle (ca. 9 ft) of pavers re-installed. There is a second circle to the right and to the rear of this one. We also fitted a quarter-circle in the near left corner. The remainder of the paver-covered surface will be in a modified running pattern.
Paver installation complete. Anything not covered by pavers will be covered by planting boxes or gravel-and-paver access paths.

More photos as the project moves ahead. We've started building the planting boxes, but no pictures yet.
posted by GreatTKR @ 8:51 PM
![]()
![]()

<< Home