Mid-summer pix of our green roof install, planting-plus-45 days
Here are pictures of the completed installation. Plants are beginning to fill in nicely. There is a definite positive advantage in terms of spread on the Florel-treated plants. I'll do a more controlled study in the near future to better document the process. But the treated plants branched quickly and fully. This translates into quicker spread.
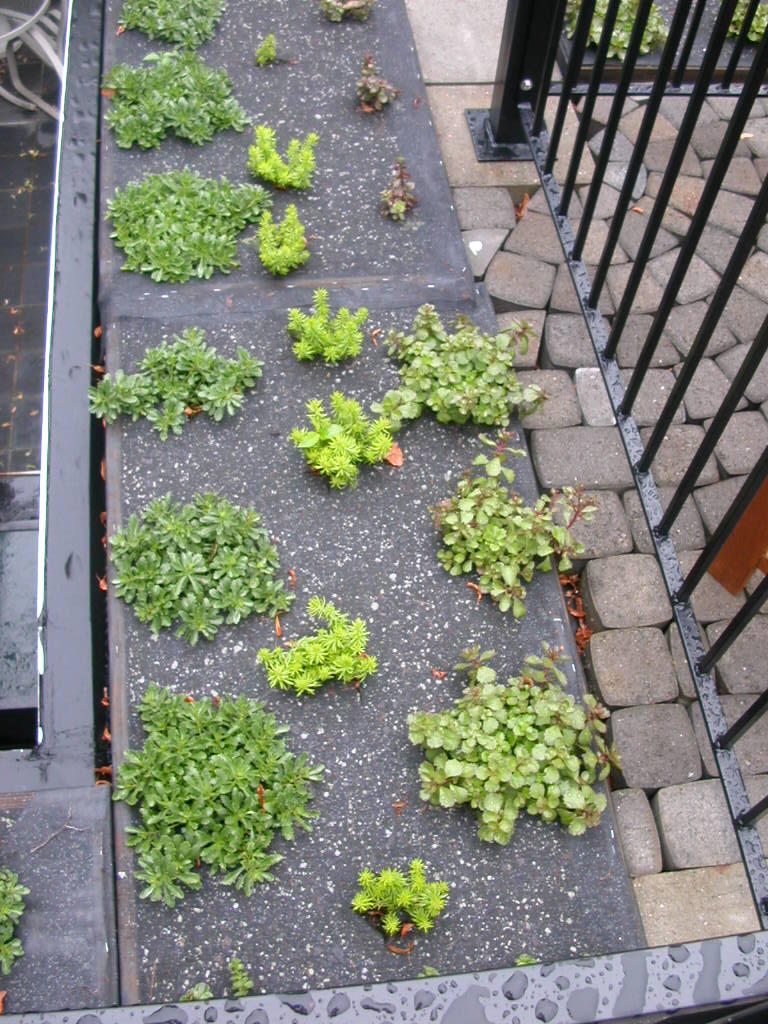
This is a shot of the same bed as a month ago. Sedum kamschaticum to the left, S. rupestre in the middle, S. spurium on the right. Notice how full these plants are. Each of these was a single-stem cutting in April. This shot was taken on 15-Jul-05.

This shot is of another bed. S. kamschaticum and S. spurium are usually constant around the roof, but the species and cultivars running down the middle of the bed will vary. Some are already clearly more successful than others.
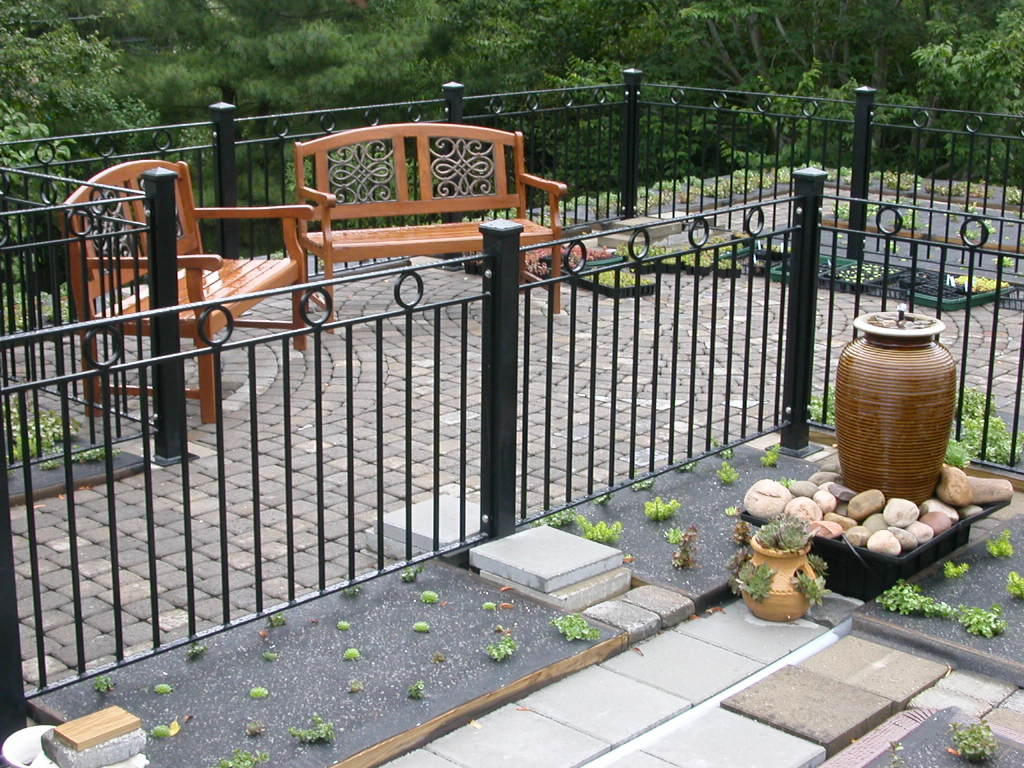
This is of the roof garden, complete with water feature and a couple of benches. If you look through the railing, you can see that I've still got material in flats to install. There are gaps along the boxes where the concrete paver circles are not quite complete. We did not cut additional pavers for the re-install. We simply re-used what we had done originally. As a result, some of the edges of the circles are not entirely complete. We'll fill those in with planting mix, and plug in some additional sedum cuttings. This should soften the edges of the boxes effectively.
You might notice that the plants in the boxes closest to the railing in this shot are still pretty small. Two things. One, this round of propagations did not get a second dose of Florel, and two, these were planted the weekend of the 4th of July, only a couple of weeks ago.
If you look closely, you can see two "solutions" in the photo as well. The white pipe that you can see simply is a tube for the power cord of the fountain. And if you can see the brown gutter, we're directing the downspout from the roof gutter across the roof garden to the guttering of the garage roof. My original intent had been to create a dry creek bed across the garden for this water. However, once the boxes were in place, it was simpler just to run a piece of downspout along the boxes, turn the corner, and empty to the gutter.

This is a similar shot, different angle. The large plants nearest the fence are S. spurium 'Leningrad White'. These are growing extremely well. Again, these were single-stem cuttings in late April.
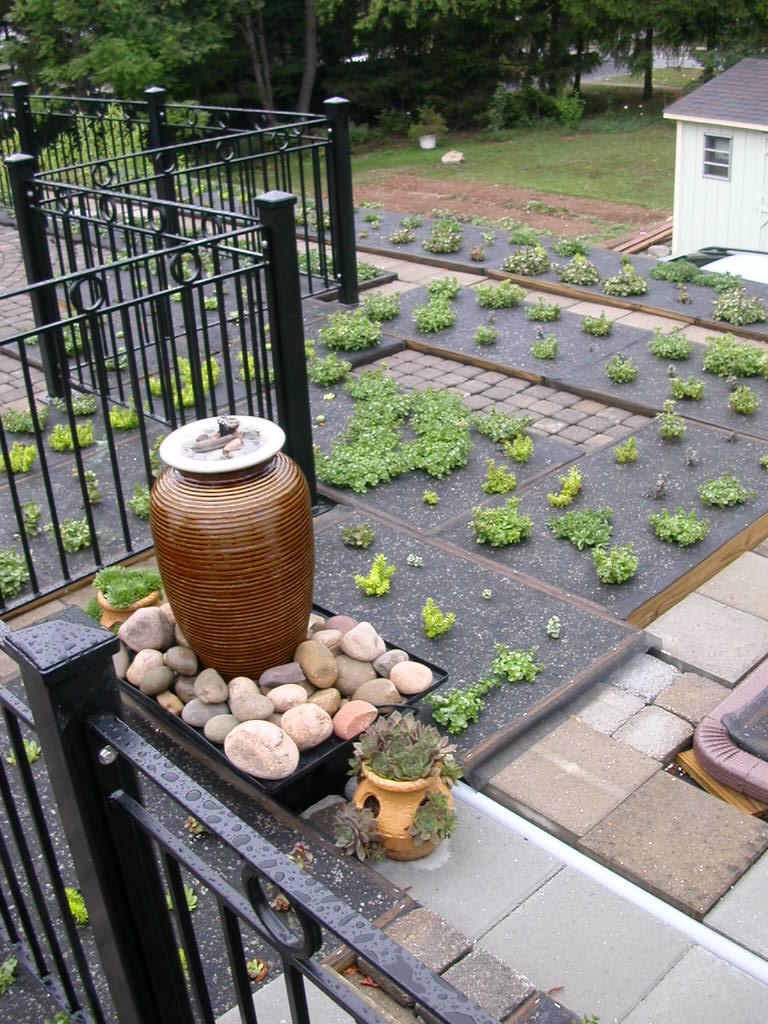
Close-up of the water feature. Those strawberry pots are sempervivums, $12 pots from Lowe's. I've plucked out a couple dozen chicks when we bought them ca. Memorial Day, and popped them into some of the beds. We'll see how hardy these are. If they fail the winter test, I'll replace them with known hardy semps from Squaw Mountain.
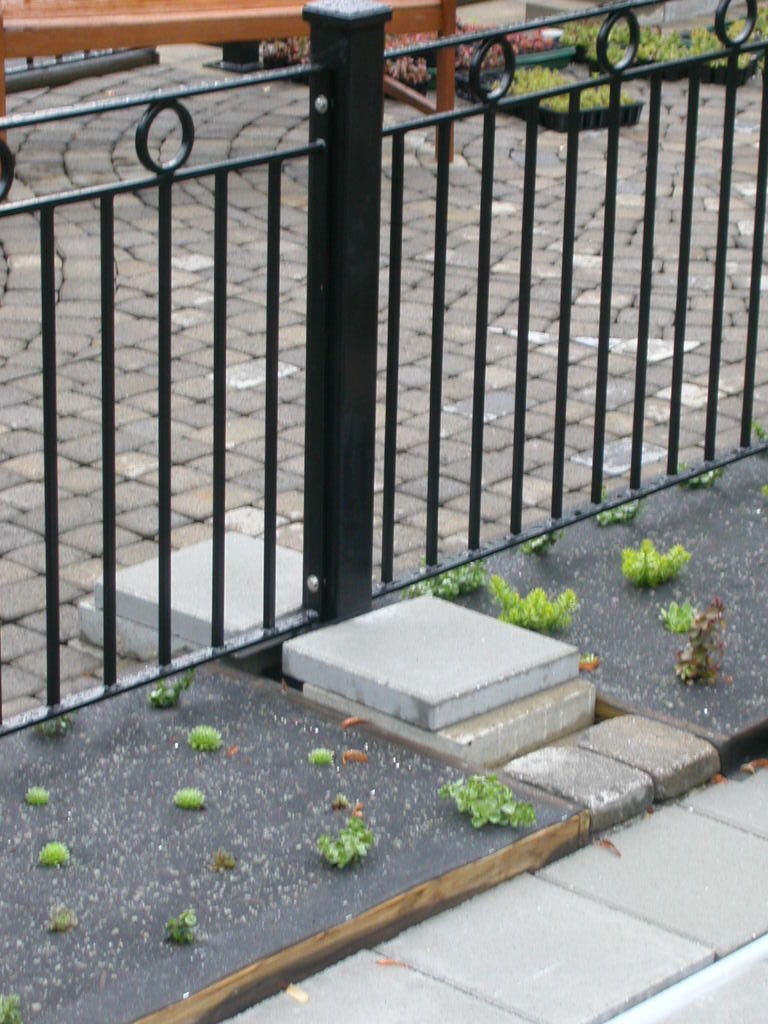
We had been considering building a wooden stile over the railing in a couple of places to make it easy to maintain the beds. As we were doing the pavers, this occurred to us. A couple of 12x12 pavers stacked near a post make a simple, inobstrusive stile.
I'll do my best to post pictures on a monthly basis. There is a little filling in to do where there were transplants failures. I've got bulbs coming in for September install, including up on the green roof. Plus, I'll probably plug in a few spots of pansies, just to see how they survive the winter on the green roof.
posted by GreatTKR @ 4:00 PM
![]()
![]()

<< Home